반응형

안녕하세요 가야태자 @talkit 입니다. ^^

오늘은 어제에 이어서 날로 먹는 글을 적겠습니다. 

어제는 우분투 리눅스에 비쥬얼 스튜디오 코드를 설치 했다면, 오늘은 RHEL, CentOS, 로키 리눅스에 설치를 해보겠습니다. 

RHEL와 CentOS가 로키 비슷하기 때문에 ^^ 저는 VMWARE 로키 리눅스를 설치해 두었습니다. 거기다가 설치 해보겠습니다. 
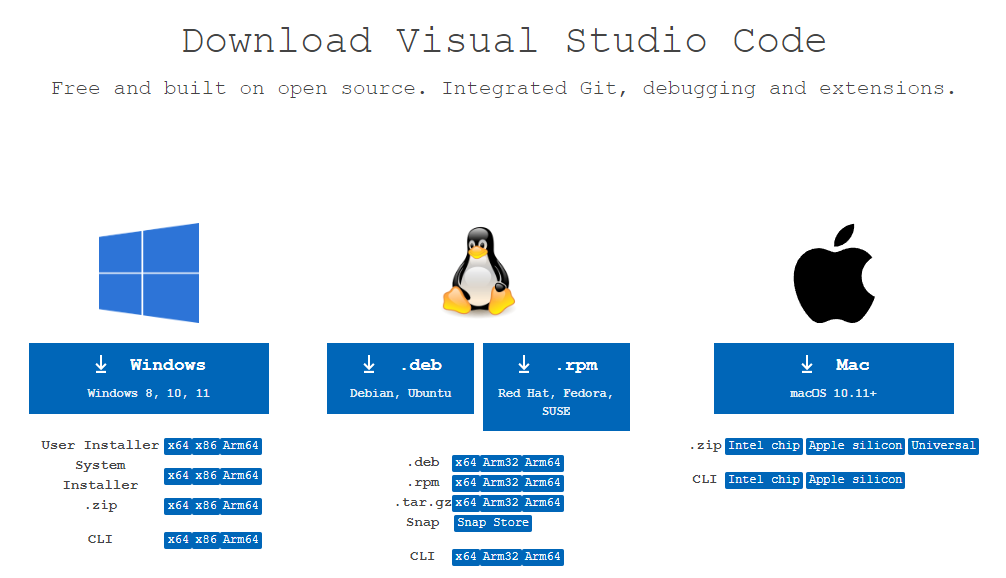
다운로드

https://visualstudio.microsoft.com/


Visual Studio: IDE and Code Editor for Software Developers and Teams

Visual Studio dev tools & services make app development easy for any developer, on any platform & language. Develop with our code editor or IDE anywhere for free.

visualstudio.microsoft.com

다운로드는 위 주소에서 하시면 됩니다. ^^

여기까지는 지난 글과 동일하네요 ^^ 여기서 갈라집니다. 우분투는 .deb를 설치 했고, 레드햇 계열은 .rpm을 받으시면 됩니다. 

https://code.visualstudio.com/sha/download?build=stable&os=linux-rpm-x64

rpm 관련 다운로드는 위 주소를 사용 합니다. 

cd 원하는디렉토리
wget "https://code.visualstudio.com/sha/download?build=stable&os=linux-rpm-x64" -O visualstudiocode.rpm

우분투와 다르게 .rpm 이라는 것 빼고 절차는 비슷합니다. 

저도 설치를 진행 해 보겠습니다. 

[talkit@localhost ~]$ wget "https://code.visualstudio.com/sha/download?build=stable&os=linux-rpm-x64" -O visualstudiocode.rpm
--2023-03-04 22:00:22--  https://code.visualstudio.com/sha/download?build=stable&os=linux-rpm-x64
Resolving code.visualstudio.com (code.visualstudio.com)... 13.107.237.49, 13.107.238.49, 2620:1ec:4e:1::49, ...
Connecting to code.visualstudio.com (code.visualstudio.com)|13.107.237.49|:443... connected.
HTTP request sent, awaiting response... 302 Found
Location: https://az764295.vo.msecnd.net/stable/92da9481c0904c6adfe372c12da3b7748d74bdcb/code-1.76.0-1677667581.el7.x86_64.rpm [following]
--2023-03-04 22:00:22--  https://az764295.vo.msecnd.net/stable/92da9481c0904c6adfe372c12da3b7748d74bdcb/code-1.76.0-1677667581.el7.x86_64.rpm
Resolving az764295.vo.msecnd.net (az764295.vo.msecnd.net)... 117.18.232.200
Connecting to az764295.vo.msecnd.net (az764295.vo.msecnd.net)|117.18.232.200|:443... connected.
HTTP request sent, awaiting response... 200 OK
Length: 134497308 (128M) [application/x-redhat-package-manager]
Saving to: ‘visualstudiocode.rpm’

visualstudiocode.rpm                                                   100%[==========================================================================================================================================================================>] 128.27M  11.2MB/s    in 12s     

2023-03-04 22:00:34 (11.1 MB/s) - ‘visualstudiocode.rpm’ saved [134497308/134497308]

rpm도 잘 다운로드 받아 졌습니다. 

이제 설치 해보겠습니다. 

ls
sudo rpm -Uvh visualstudiocode.rpm

명령어는 위와 같습니다.  설치하실때 관리자로 하셨다면 저렇게 하시면 되구요.

설치하실때 관리자로 안하셨으면 T.T su - 명령어를 이용해서 root로 접속을 하시고 진행 하시면 됩니다. 

또는 로그인을 root로 하십시오 ^^

리눅스/Linux su, sudo 슈퍼관리자와 다른 사용자가 되어보자. How to use su,sudo that get root account's power, or change other user's power :: 가야태자의 IT이야기 (tistory.com)


리눅스/Linux su, sudo 슈퍼관리자와 다른 사용자가 되어보자. How to use su,sudo that get root account's power,

안녕하세요 가야태자 @talkit 입니다. 오늘은 계속 사용하고 있는 sudo와 아직 보여 드리지 않았지만, su 라는 명령어에 대해서 말씀 드리겠습니다. su는 사용자의 권한을 획득하는 명령어이고, 여기

talkit.tistory.com

root 전환과 관련된 이야기는 위글이 도움이 되실 것 같습니다. 

그럼 저는 sudo로 진행 해 보겠습니다. 

sudo rpm -Uvh visualstudiocode.rpm 
[sudo] talkit의 암호: 
경고: visualstudiocode.rpm: Header V4 RSA/SHA256 Signature, key ID be1229cf: NOKEY
Verifying...                          ################################# [100%]
준비 중...                         ################################# [100%]
Updating / installing...
   1:code-1.76.0-1677667581.el7       ################################# [100%]
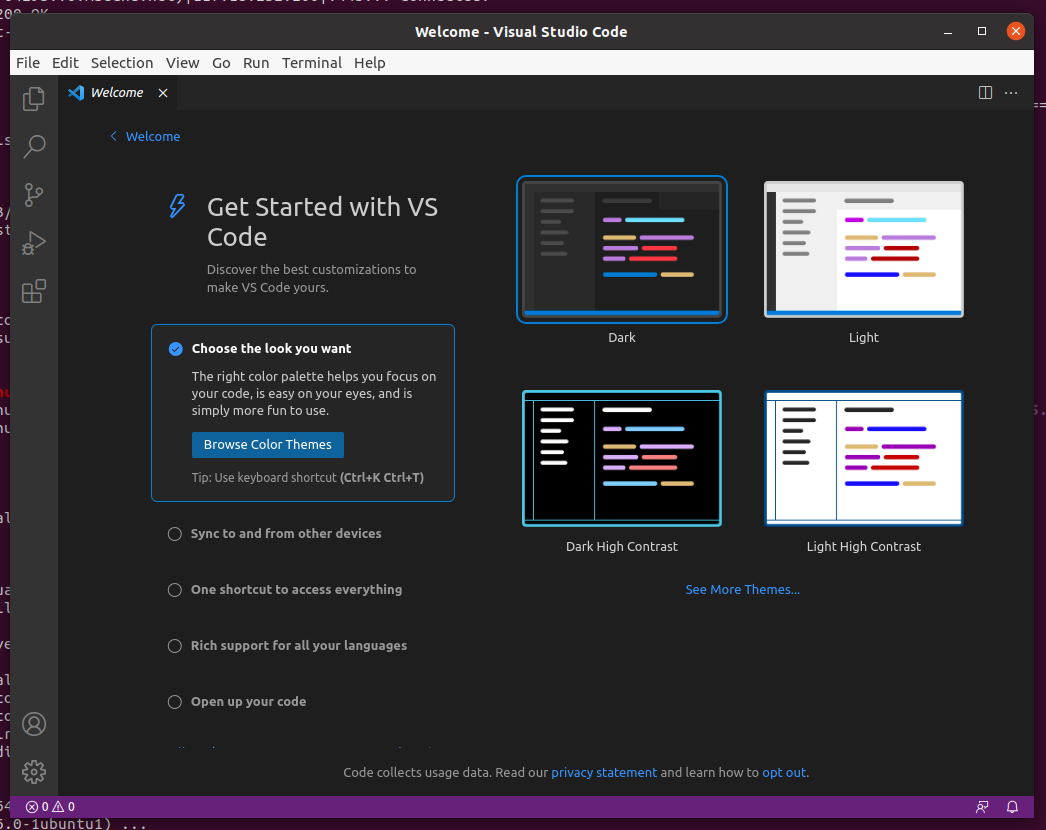
[talkit@localhost ~]$

요렇게 잘 설치 가 되었습니다.

여기서도 역시 켜 보고 마치도록 하겠습니다. 

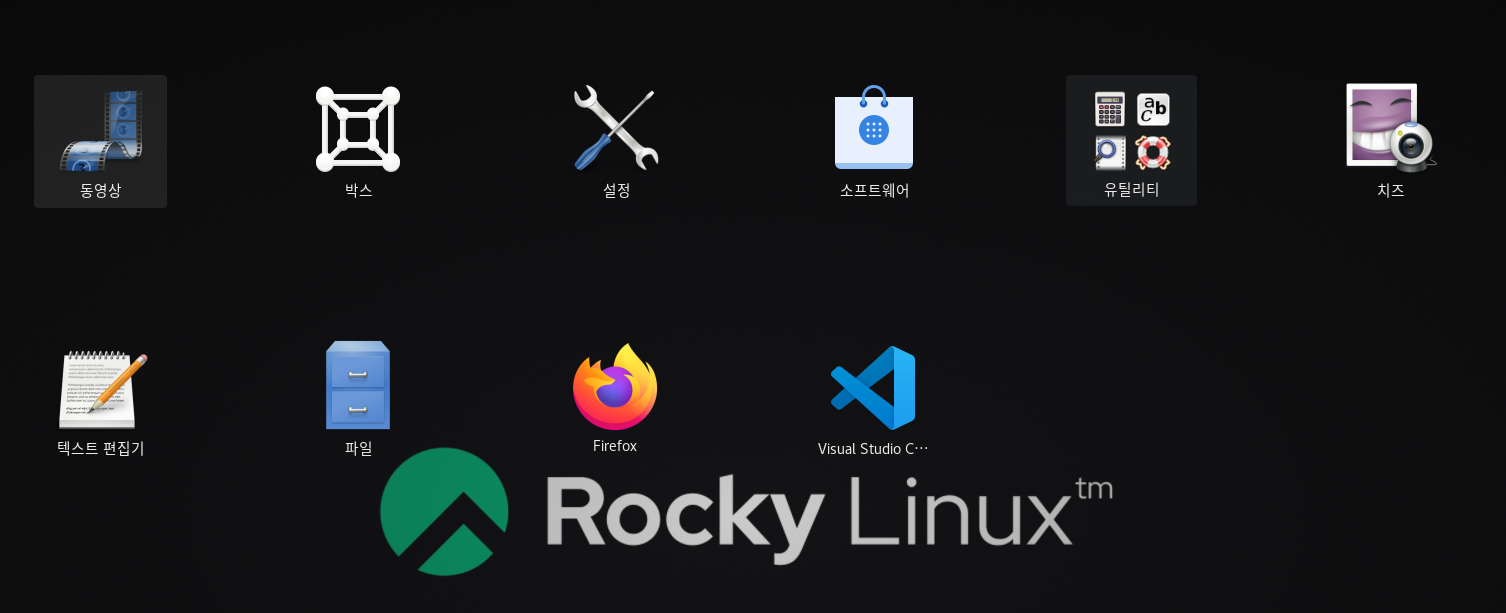
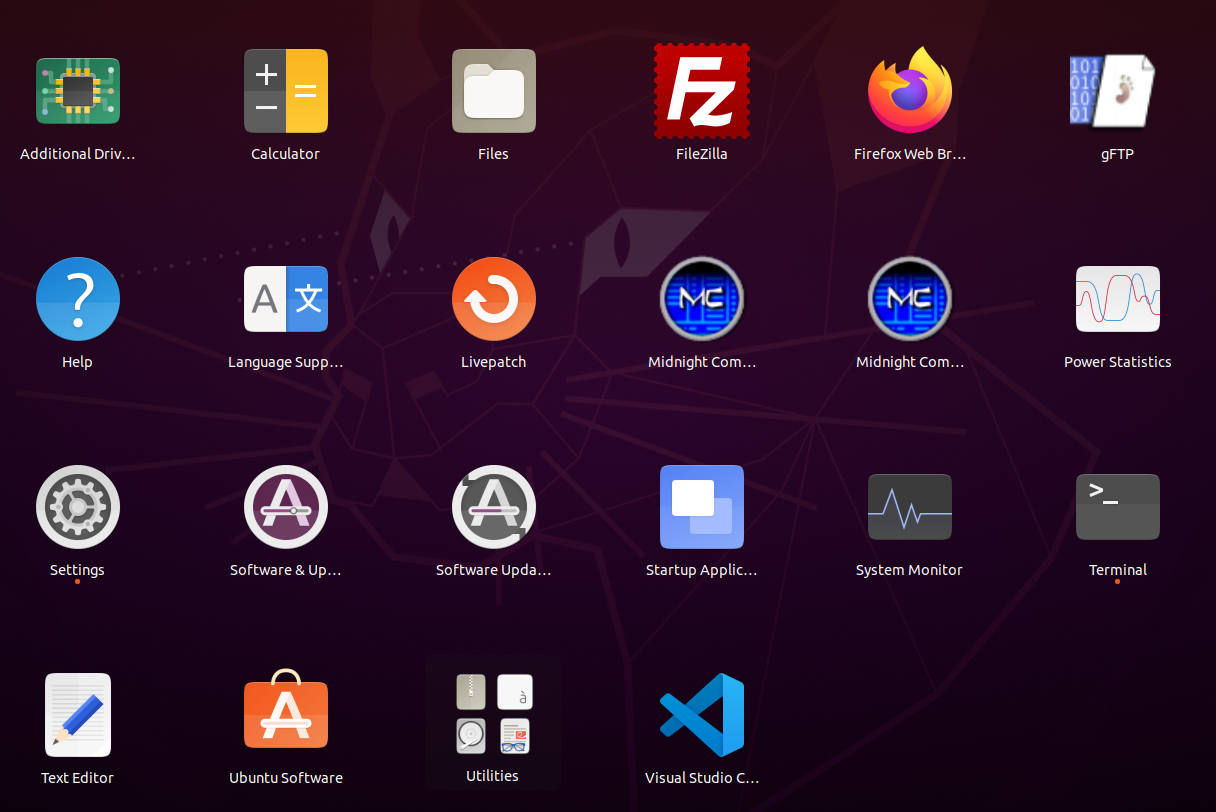
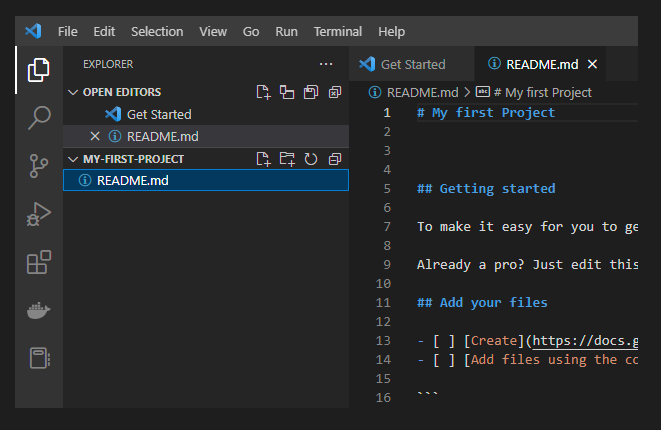
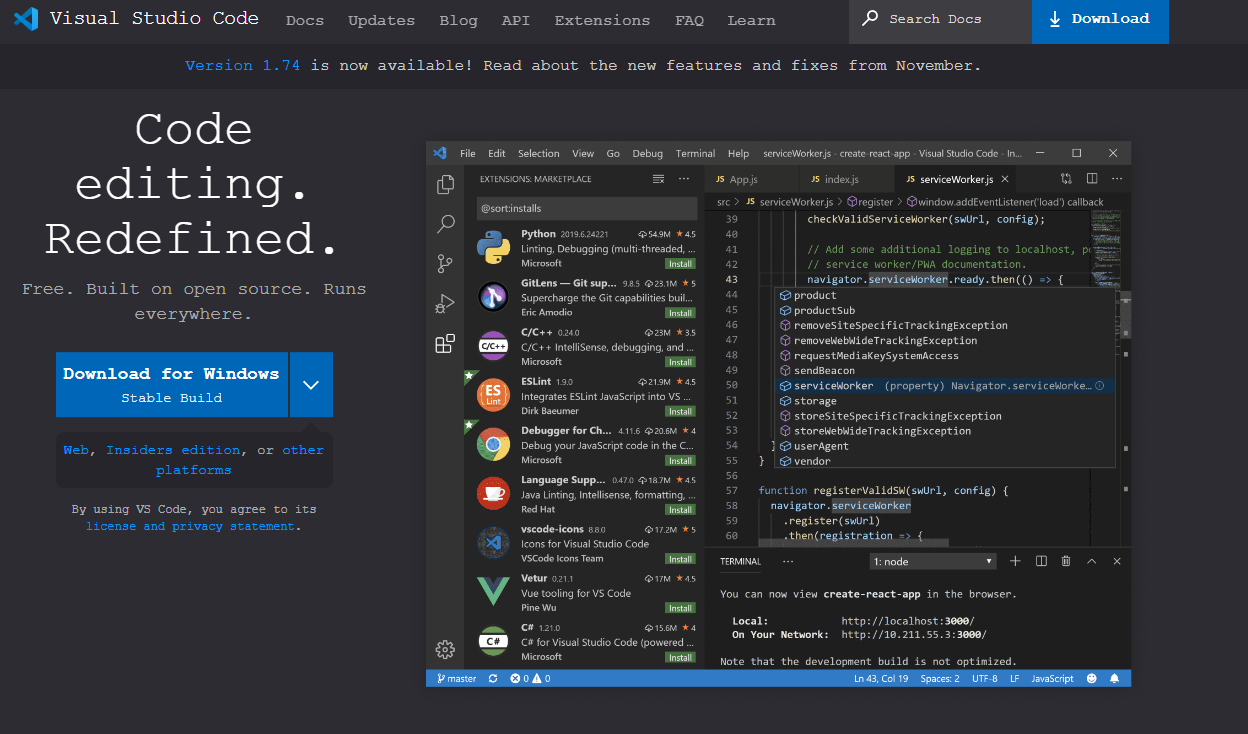
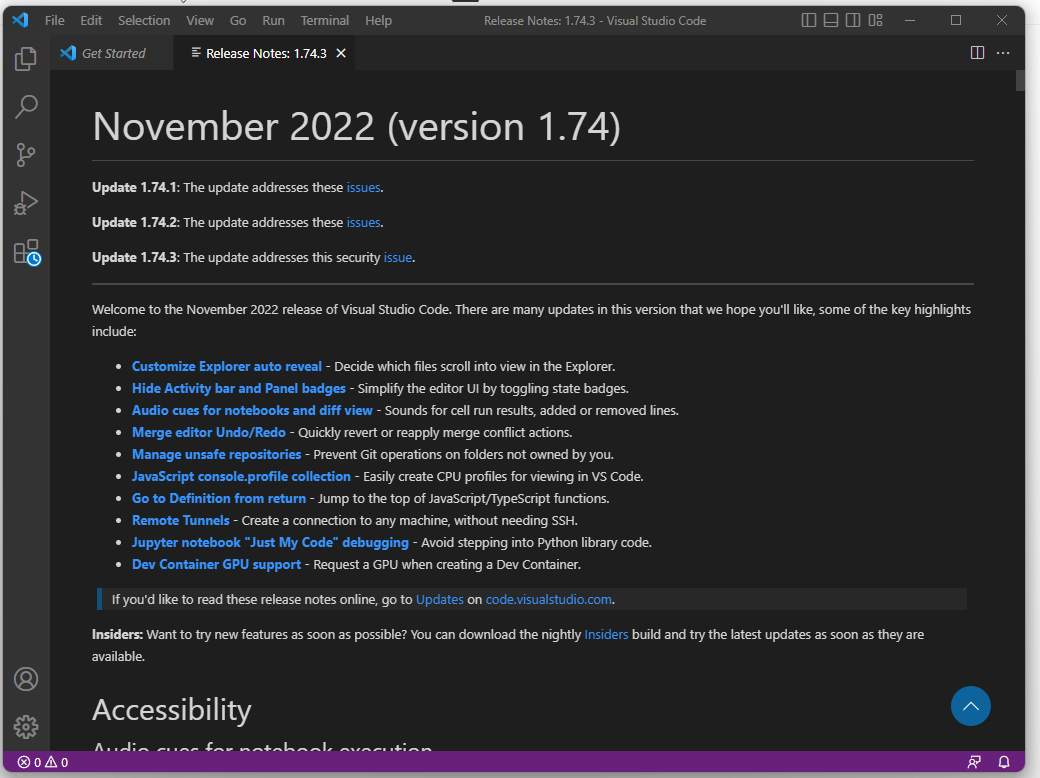
우분투와 마찬가지로 Visual Studio Code가 잘 설치 되어 있습니다. 

Visual Studio Code가 들어옴으로 해서 리눅스가 원래도 훌륭한 개발 툴이었지만 ^^ 더 훌륭한 개발 툴이 되었습니다. 

감사합니다. 


반응형
반응형

  안녕하세요 가야태자 @talkit 입니다.  

  오늘은 Visual Studio Code를 우분투 리눅스에 설치 해보겠습니다. 

개요 

  원래 마이크로소프트의 빌게이즈 형님과 스티브 발머 형님이 계실 때는 리눅스와 사이가 많이 나빴습니다. 그런데 새로운 대표님은 리눅스하고 너무 친 합니다. ^^ 마이크로소프트 제품이 많이 리눅스로 포팅 되고 있습니다. 그 중에서 개발자용 에디터인 VisualStudioCode도 포팅 되어 있습니다. 

  이러한 비쥬얼 스튜디오 코드를 제 우분투에 설치 해보록 하겠습니다. 제 경험이 다른 분들께 도움이 되시기를 바라면서 한번 설치 해보겟습니다. 

다운로드

  설치하시려면 저하고 항상 하시는 것이 다운로드 입니다. 

Visual Studio: IDE and Code Editor for Software Developers and Teams (microsoft.com)


Visual Studio: IDE and Code Editor for Software Developers and Teams

Visual Studio dev tools & services make app development easy for any developer, on any platform & language. Develop with our code editor or IDE anywhere for free.

visualstudio.microsoft.com

위 페이지에서 다운로드를 하시면 됩니다. 

그런데 리눅스용을 다운로드 해야 하므로 윈도우즈에서 접속 하시면 

저기 파란색 버튼을 누르시고,  지금은 우분투에 설치할 예정이어서 ^^ .deb를 선택 하시면 됩니다. 

리눅스에 다시 FTP로 올리셔야 해서 그러지 마시고 다음을 따라 하시면 됩니다. 

혹시나 리눅스에서 firefox 또는 Chrome으로 접속한다면 그냥 저거 누르셔도 됩니다. ^^

일단은 윈도우에서도 한번 누르십시오 ^^

그러면 위와 비슷하게 나올 겁니다. 

저기서 direct download link 보이시죠 저기 위에 마우스 올리고 오른쪽 마우스 누르셔서 링크를 복사하십시오.

https://code.visualstudio.com/sha/download?build=stable&os=linux-deb-x64

그러면 현재 저는 위와 비슷하게 나옵니다. 

우분투에서 쉘을 하나 여시고 ^^

cd 원하는디렉토리
wget "https://code.visualstudio.com/sha/download?build=stable&os=linux-deb-x64" -O visualstudiocode.deb

위와 같이 치시면 파일이 받아 집니다. 

저도 해보겠습니다. 

wget wget "https://code.visualstudio.com/sha/download?build=stable&os=linux-deb-x64" -O visualstudiocode.deb
--2023-03-04 21:45:43--  http://wget/
Resolving wget (wget)... failed: Temporary failure in name resolution.
wget: unable to resolve host address ‘wget’
--2023-03-04 21:45:43--  https://code.visualstudio.com/sha/download?build=stable&os=linux-deb-x64
Resolving code.visualstudio.com (code.visualstudio.com)... 13.107.238.49, 13.107.237.49, 2620:1ec:4e:1::49, ...
Connecting to code.visualstudio.com (code.visualstudio.com)|13.107.238.49|:443... connected.
HTTP request sent, awaiting response... 302 Found
Location: https://az764295.vo.msecnd.net/stable/92da9481c0904c6adfe372c12da3b7748d74bdcb/code_1.76.0-1677667493_amd64.deb [following]
--2023-03-04 21:45:44--  https://az764295.vo.msecnd.net/stable/92da9481c0904c6adfe372c12da3b7748d74bdcb/code_1.76.0-1677667493_amd64.deb
Resolving az764295.vo.msecnd.net (az764295.vo.msecnd.net)... 117.18.232.200
Connecting to az764295.vo.msecnd.net (az764295.vo.msecnd.net)|117.18.232.200|:443... connected.
HTTP request sent, awaiting response... 200 OK
Length: 94825848 (90M) [application/octet-stream]
Saving to: ‘visualstudiocode.deb’

visualstudiocode.deb                                  36%[========================================>                                                                           ]  32.68M  10.9MB/s    eta 5svisualstudiocode.deb                               100%[===============================================================================================================>]  90.43M  11.2MB/s    in 8.2s    

2023-03-04 21:45:52 (11.1 MB/s) - ‘visualstudiocode.deb’ saved [94825848/94825848]

FINISHED --2023-03-04 21:45:52--
Total wall clock time: 8.8s
Downloaded: 1 files, 90M in 8.2s (11.1 MB/s)

저는 잘 받아 졌습니다. 

그러면 설치를 해보겠습니다. 

ls
sudo apt install ./visualstudiocode.deb

ls를 쳐서 다운로드한 파일이 잇는지 확인 하시고 ^^

apt install을 이용해서 설치 합니다.  파일 설치할때는 ./를 무조건 넣어야 하나 봅니다. 

sudo apt install ./visualstudiocode.deb
Reading package lists... Done
Building dependency tree       
Reading state information... Done
Note, selecting 'code' instead of './visualstudiocode.deb'
The following NEW packages will be installed:
  code
0 upgraded, 1 newly installed, 0 to remove and 27 not upgraded.
Need to get 0 B/94.8 MB of archives.
After this operation, 394 MB of additional disk space will be used.
Get:1 /home/talkit/visualstudiocode.deb code amd64 1.76.0-1677667493 [94.8 MB]
Selecting previously unselected package code.
(Reading database ... 167921 files and directories currently installed.)
Preparing to unpack .../talkit/visualstudiocode.deb ...
Unpacking code (1.76.0-1677667493) ...
Setting up code (1.76.0-1677667493) ...
Processing triggers for mime-support (3.64ubuntu1) ...
Processing triggers for gnome-menus (3.36.0-1ubuntu1) ...
Processing triggers for shared-mime-info (1.15-1) ...
Processing triggers for desktop-file-utils (0.24-1ubuntu3) ...

저는 설치가 잘 되었습니다. 

제 우분투에 설치 된 프로그램들을 보면 제일 밑에 보이시죠 Visual Studio Code 가 잘 설치 되었습니다. 

실행 해보고 오늘글은 마치도록 하겠습니다. 

오 윈도우즈와 동일하게 비쥬얼스튜디오 코드가 잘 실행 됩니다. 

감사합니다. 


반응형
반응형

안녕하세요 가야태자 @talkit 입니다.

오늘은 gitlab 관련해서 또 열심히 적고 있는데 gitlab의 프로젝트와 VisualStudio 또는 eclipse 또는 안드로이드 스튜디오, 비주얼 스튜디오 등과 연동을 해야 합니다.

해당 작업을 진행 해보겠습니다.

선행 작업

gitlab 과 visual studio code를 연동하려면 먼저 선행 되어야할 작업이 있습니다.

먼저, gitlab에 가입이 되어 있어야 합니다.

깃랩/gitlab 깃랩 가입하기 How to join gitlab :: 가야태자의 IT이야기 (tistory.com)

그리고, gitlab에 프로젝트가 존재 해야 합니다.

깃랩/gitlab 깃립에 빈 프로젝트 만들기. How to create a blank Project on gitlab :: 가야태자의 IT이야기 (tistory.com)

또한 visual studio code가 설치 되어 있어야겠지요 ^^

마이크로소프트 무료 개발용 에이터 비쥬얼 스튜디오 코드 설치하기. How to install Microsoft Visual Studio Code for Development editor. :: 가야태자의 IT이야기 (tistory.com)

git 이라는 도구도 물론 설치 되어 있어야 합니다.

깃/git 윈도우용/윈도우즈용 깃 설치하기 How to install git for windows :: 가야태자의 IT이야기 (tistory.com)

오늘 글을 쓰기 위해서 열심히 위 글들을 적었습니다. ^^

이미 수행 하신 작업은 그냥 넘어 가셔도 되고, 안하신 작업은 진행하고 오십시오.

깃랩/gitlab 작업

오늘은 gitlab에서 만든 신규 프로젝트를 Visual Studio Code에서 사용할 것입니다.

다음에는 Visual Studio Code에서 만든 Project를 gitlab에 공유 하는 글도 한번 써보도록 하겠습니다.

Projects · Dashboard · GitLab

에 접속하십시오. 위에서 가입한 아이디로 로그인 하시면 되구요.

요렇게 지난 번에 만든 프로젝트가 짠하고 기다리고 있습니다. ^^

일단 프로젝트 명을 클릭 하셔서 들어 가십시오.

화면에 떠 있는 Div들을 X를 누르셔서 닫으시면 위와 같은 그림이 될껍니다.

저기서 오른쪽 중간 쯤에 Clone 이라는 버튼 보이시죠 클릭 하십시오.

저기 보시면 Visual Studio Code(HTTPS) 를 누르시거나, Clone with HTTPS를 누르시면 됩니다. 오늘은 쉬운 방법으로 해보겠습니다.

Visual Studio Code(HTTPS) 를 이용해서 해보도록 하겠습니다.

클릭 하십시오.

요렇게 나올텐데 당연히 Open 하십시오.

비주얼 스튜디오 코드/Visual Studio Code 작업

이제 vscode가 뜨면서 위와 같이 물어 볼껍니다. Open 을 클릭하십시오.

그러면 git 저장소를 고르라고 아래와 같이 뜰껍니다.

뜨면 적당한 폴더를 고르십시오.

저는 C:\dev\study\git 이라는 폴더를 하나 만들었습니다.

그리고 Select as Repository Destination 버튼을 선택 하십시오.

2023-01-14 20:06:29.788 [info] Log level: Info

2023-01-14 20:06:29.926 [info] Validating found git in: "C:\Program Files\Git\cmd\git.exe"

2023-01-14 20:06:29.927 [info] Using git "2.29.2.windows.3" from "C:\Program Files\Git\cmd\git.exe"

2023-01-14 20:06:29.942 [info] > git rev-parse --show-toplevel [153ms]

2023-01-14 20:06:29.942 [info] fatal: not a git repository (or any of the parent directories): .git

2023-01-14 20:06:30.114 [info] > git rev-parse --show-toplevel [159ms]

2023-01-14 20:06:30.114 [info] fatal: not a git repository (or any of the parent directories): .git

2023-01-14 20:06:30.188 [info] > git rev-parse --show-toplevel [62ms]

2023-01-14 20:06:30.188 [info] fatal: not a git repository (or any of the parent directories): .git

2023-01-14 20:06:30.572 [info] > git rev-parse --show-toplevel [50ms]

2023-01-14 20:06:30.572 [info] fatal: not a git repository (or any of the parent directories): .git

2023-01-14 22:20:22.285 [info] GitProtocolHandler.handleUri(vscode://vscode.git/clone?url%3Dhttps%3A%2F%2Fgitlab.com%2F~~~~~~~~~~%2Fmy-first-project.git)

2023-01-14 22:20:22.303 [info] Executing git.clone for https://gitlab.com/~~~~~~~~/my-first-project.git

2023-01-14 22:36:43.713 [info] > git clone https://gitlab.com/~~~~~~~/my-first-project.git c:\dev\study\git\my-first-project --progress [2474ms]

2023-01-14 22:36:43.713 [info] Cloning into 'c:\dev\study\git\my-first-project'...

remote: The project you were looking for could not be found or you don't have permission to view it.

fatal: repository 'https://gitlab.com/~~~~~~~~~~~~/my-first-project.git/' not found

2023-01-14 22:37:02.491 [info] > git rev-parse --show-toplevel [70ms]

2023-01-14 22:37:02.491 [info] fatal: not a git repository (or any of the parent directories): .git

위와 같이 오류가 나네요 T.T

이게 잘 되신 분은 그냥 새창으로 열꺼냐고 아마 물을 껀데 여시구요.

안되신 분은 또 저 따라 하시면 됩니다.

다시 위 지점으로 돌아가서 저기 보이는 Clone with HTTPS의 복사 버튼을 눌러서 복사 하십시오.

그리고 열려 있는 비쥬얼 스튜디오에서 File >> New Windows를 선택 하십시오.

다음으로, 왼쪽의 Git 아이콘을 클릭하십시오.

그리고 저기 보이는 Clone Repository 를 클릭하십시오.

아까 복사하신 것을 붙여 넣기 하십시오.

붙여 넣고 엔터 치시면 됩니다.

그리고 아까 처럼 로컬 저장소를 선택하십시오.

또 이화면이 나올껍니다. ^^

고르시고, Select as Repository Destination 버튼을 클릭하십시오.

실제로는 또 실패 했습니다. ^^

https://gitlab.com/userid/my-first-project.git

주소가 위와 같은 겁니다.

위주소를

https://userid@gitlab.com/userid/my-first-project.git

로 하시면 됩니다. 혹시 뒤에 userid가 동일하지 않아도 됩니다.

userid의 주인인 분이 여러분을 초대 했다면 clone이 됩니다.

당연히 userid는 발급 받으신 gitlab 아이디입니다. ^^ (이메일 주소 말구요.)

저렇게 바꾸시고 엔터 치시면

이렇게 나올껍니다.

원래는 예전에 그냥 나왔던 것 같은데 말이죠 아닌가 봅니다.

![[Pasted image 20230114225743.png]]

요렇게 나옵니다. 저는 방법 새 창을 하나 열어 놔서 그냥 Open 누르겠습니다.

혹시나 새로운 창이 아니시면 Open in New Window가 편합니다. ^^

연동은 너무 잘 되었구요.

왼쪽 Explorer에 My-first-project가 나오고 README 하나 있는데 저거 하나가 잘 나옵니다. ^^

일단 연동이 되었구요

이제 그냥 README를 살짝 고쳐서 Commit과 Push를 해보고 끝내겠습니다.

Commit과 Push개념은 다음에 말씀 드리겠습니다.

원래 README.md 파일의 내용은 위와 비슷합니다.

내 첫번째 프로젝트로 제목만 바꿔서 Commit 하고 Push 해보겠습니다.

내용을 바꾸게 되면

왼쪽에 Git 아이콘 1 또는 다른 숫자가 나오는데 저게 Update 되거나 수정 된 것들의 숫자를 나타냅니다.

자 그럼 해당 아이콘을 눌러 보겠습니다.

README를 Stage로 바꿔 줘야 해서 Stage Changes를 클릭하십시오.

위와 같이 한글로 변경 저같은 경우는 진짜로 한글로 변경 해서요 ^^

Comment를 적고 Commit 버튼을 누르십시오.

Sync Changes 1 이 있으면 로컬 git 하고는 통신을 했지만 gitlab하고 통신을 해야 합니다. 그래서 위 그림 처럼 ... 을 누르시고, Push를 누르시면 됩니다. ^^

요렇게 바뀐 것을 볼 수 있습니다. ^^

여기까지 하시면 vscode 하고 연결하고 연결 된 상태에서 약간을 수정하고 보내기를 하실 수 있습니다.

감사합니다.

P.S. 이렇게 하는 이유는 다들 아시겠지만, 개발을 혼자서만 하지 않기 때문입니다. ^^

#git #gitlab #visualstudiocode #visualstudio

반응형
반응형

안녕하세요 가야태자 @talkit 입니다. 

오늘은 오랫만에 Visual Studio를 써보려고 합니다. 

그전에 정말 쉽기는 하지만, Visual Studio Code를 설치하는 법을 알려 드리겠습니다. 

다운로드

 우선 프로그램을 사용하려면, 다운로드 해야겠지요 ^^

https://code.visualstudio.com/Download


Download Visual Studio Code - Mac, Linux, Windows

Visual Studio Code is free and available on your favorite platform - Linux, macOS, and Windows. Download Visual Studio Code to experience a redefined code editor, optimized for building and debugging modern web and cloud applications.

code.visualstudio.com

위 URL에 가시면 OS 별로 다운로드 할 수 있는 파일들이 나옵니다. 

저는 Windows에 설치를 할꺼라서 Windows를 클릭 해서 받으시면 됩니다. 음 요즘은 Arm용 OS도 있어서 Arm 도 지원을 하고 있습니다. 그리고 저기 마소의 최대 경쟁자인 Mac도 지원을 하고 있습니다. 

그리고, 제가 다음에는 리눅스용도 설치 해보겠습니다.

오늘은 윈도우젱서 프로그램이 필요해서 윈도우즈용을 설치 해보겠습니다. 

우선, Windows 버튼을 누르셔서 Windows용을 다운로드 하십시오.

설치

저는 다운로드 폴더에 잘 다운로드를 했습니다. 

계약 동의 하시구요.

다음 누릅니다.

저기서 선택을 하십시오. 원하는 선택을 하시면 됩니다. 저는 그냥 다음 누릅니다. 

저는 패스만 추가 했구요. 

저기서 설치 누르시면 됩니다. 

이제 설치가 끝나면 다음 화면이 나옵니다. 

설치 확인

종료를 누르시면 됩니다. 그러면, 설치가 다 되었기 때문에 ^^

위와 같이 설치 다된 모습입니다. 

이제 다음 글 부터 ^^ Visual Studio Code와 관련된 글들을 적어 보겠습니다. 

감사합니다. 

반응형

+ Recent posts