# Default server configuration
#
server {
        listen 80 default_server;
        listen [::]:80 default_server;

        root /var/www/html;

        # Add index.php to the list if you are using PHP
        index index.html index.htm index.nginx-debian.html;

        server_name _;

        location / {
                # First attempt to serve request as file, then
                # as directory, then fall back to displaying a 404.
                try_files $uri $uri/ =404;
        }
}
일단 SSL이라든지 여러가지 설정이 주석으로 정의 되어 있습니다만, 주석부분은 대부분 지워 버리면 실제로 위와 같은 결과만 나옵니다. ^^
default 서버는 80번 포트에서 대기 중이구요. /var/www/html 폴더에 html 파일이 있습니다.
그리고 시작 파일은 index.html, index.htm, index.nginx-debian.html 이 시작 파일 입니다.
default를 없애고, example를 만들어 보도록 하겠습니다. 저는 앞으로 여기서 mattermost를 만들어야겠지요 ^^ 아닌가 mattermost는 나중에 ^^
sudo mkdir /var/www/example
example 디렉토리를 웹 홈에 만들구요.
sudo vi /var/www/example/index.html
index.html 파일을 생성 합니다.
리눅스/Linux vi/vim NIX에서 가장 유명한 텍스트 편집기 - 글쓰기. One of the best text editor on NIX fields. - Writing https://talkit.tistory.com/699
위 글을 보시면 vi로 글쓰는 방법이 나와 있습니다. ^^
<html>
	<body>
	NGINX 테스트 웹페이지에 오신 것을 환영합니다.
	<body>
</html>
위 코드를 index.html에 붙여 넣으십시오. 저장하고 나오시면 됩니다.
:wq 안 잃어버리셨죠 ^^
sudo vi /etc/nginx/sites-available/example.com
example.com 블락을 만들기위해서 파일을 하나 만들겠습니다.
server {
listen 80;
root /var/www/example;
index index.html;
server_name 127.0.0.1;
}
sudo systemctl status nginx
● nginx.service - A high performance web server and a reverse proxy server
     Loaded: loaded (/lib/systemd/system/nginx.service; enabled; vendor preset: enabled)
     Active: active (running) since Sun 2023-01-01 00:30:21 PST; 10s ago
       Docs: man:nginx(8)
    Process: 3211 ExecStartPre=/usr/sbin/nginx -t -q -g daemon on; master_process on; (code=exited, status=0/SUCCESS)
    Process: 3212 ExecStart=/usr/sbin/nginx -g daemon on; master_process on; (code=exited, status=0/SUCCESS)
   Main PID: 3213 (nginx)
      Tasks: 17 (limit: 19071)
     Memory: 13.6M
     CGroup: /system.slice/nginx.service
             ├─3213 nginx: master process /usr/sbin/nginx -g daemon on; master_process on;
             ├─3214 nginx: worker process
             ├─3215 nginx: worker process
             ├─3216 nginx: worker process
             ├─3217 nginx: worker process
             ├─3218 nginx: worker process
             ├─3219 nginx: worker process
             ├─3220 nginx: worker process
             ├─3221 nginx: worker process
             ├─3222 nginx: worker process
             ├─3223 nginx: worker process
             ├─3224 nginx: worker process
             ├─3225 nginx: worker process
             ├─3226 nginx: worker process
             ├─3227 nginx: worker process
             ├─3228 nginx: worker process
             └─3229 nginx: worker process

Jan 01 00:30:21 ubuntu systemd[1]: Starting A high performance web server and a reverse proxy server...
Jan 01 00:30:21 ubuntu systemd[1]: Started A high performance web server and a reverse proxy server.
재시작 했으면 상태도 한번 확인해주시고 ^^
브라우져에서 확인을 하면
저같은 경우는 위와 같이 나옵니다. ^^
잘 만들어서 잘 구동이 되고 있네요 ^^
오늘은 여기까지 하겠습니다. 제 목표는 저기 Not secure 없애는 거여서 다음글 또는 그 다음 글에서 아마 가능 할 것으로 생각 됩니다. ^^
이번에 적으려고 하는 NGINX도 웹서버의 일종입니다. Apache 보다는 좀 더 뒤에 나온 제품이어서 좀 더 신선한 기능들을 제공하긴 하지만, 서로 경쟁 관계여서 요즘은 NGINX가 좀 더 점유율을 가져가고 있다고 알고 있습니다. ^^ 서로를 보고 보완을 하고 있는 것으로 알고 있습니다.
W3Techs - extensive and reliable web technology surveys 출처 : https://w3techs.com/
[무료소프트웨어] 무료 보안쉘 클라이언트 PuTTY 최신 버전 다운로드 및 설치하기. How to Install the latest version PuTTY that is free Secure Shell Client. https://talkit.tistory.com/674
리눅스에 접속하시는 방법은 위 글들에서 설명해 두었습니다. 참고해서 접속하시면 될 것 같습니다.
리눅스에 NGINX 설치
저는 계속 Putty러 접속을 합니다.
여러분들이 VMWARE에 우분투를 설치하셨거나, 우분투 리눅스 VPS를 하나 가지고 계시거나 하다는 전제 하에서 이 글은 시작 하고 있습니다.
리눅스에 접속하기
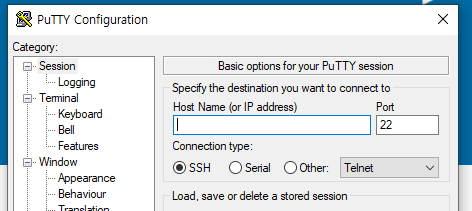
서버에 우선 접속하십시오.
Putty를 여시고 저기 주소에 입력하시거나 아래에 있는 저장된 세션에서 선택해서 접속 하시면 됩니다.
login as: talkit
talkit@192.168.0.27's password:
Welcome to Ubuntu 20.04.5 LTS (GNU/Linux 5.15.0-56-generic x86_64)

 * Documentation:  https://help.ubuntu.com
 * Management:     https://landscape.canonical.com
 * Support:        https://ubuntu.com/advantage

0 updates can be applied immediately.

Your Hardware Enablement Stack (HWE) is supported until April 2025.
Last login: Thu Dec 29 23:51:08 2022 from 192.168.0.3
talkit@ubuntu:~$ ps -ef | grep nginx
talkit      2021    2007  0 23:50 pts/0    00:00:00 grep --color=auto nginx
talkit@ubuntu:~$
저는 잘 접속이 되었구요.
접속해서 ps로 nginx가 없는 것 까지 확인 했습니다. 제가 Mattermost를 설치하면서 nginx도 설치 했거든요 ^^
nginx 설치 이전으로 VMWARE파일을 돌려 놨습니다.
NGINX 설치하기
그 다음 과정을 계속 진행 하겠습니다.
sudo apt update
위 명령어는 옵셔널 이긴 하지만 한번씩 해주는 것이 좋습니다.
sudo apt install nginx
NGINX 설치는 정말 간단합니다. ^^
 sudo apt install nginx
Reading package lists... Done
Building dependency tree
Reading state information... Done
The following additional packages will be installed:
  libnginx-mod-http-image-filter libnginx-mod-http-xslt-filter libnginx-mod-mail libnginx-mod-stream
  nginx-common nginx-core
Suggested packages:
  fcgiwrap nginx-doc
The following NEW packages will be installed:
  libnginx-mod-http-image-filter libnginx-mod-http-xslt-filter libnginx-mod-mail libnginx-mod-stream
  nginx nginx-common nginx-core
0 upgraded, 7 newly installed, 0 to remove and 0 not upgraded.
Need to get 605 kB of archives.
After this operation, 2,141 kB of additional disk space will be used.
Do you want to continue? [Y/n] y
Get:1 http://us.archive.ubuntu.com/ubuntu focal-updates/main amd64 nginx-common all 1.18.0-0ubuntu1.4                                                                                                                                                                                                                        [37.7 kB]
Get:2 http://us.archive.ubuntu.com/ubuntu focal-updates/main amd64 libnginx-mod-http-image-filter amd6                                                                                                                                                                                                                       4 1.18.0-0ubuntu1.4 [14.8 kB]
Get:3 http://us.archive.ubuntu.com/ubuntu focal-updates/main amd64 libnginx-mod-http-xslt-filter amd64                                                                                                                                                                                                                        1.18.0-0ubuntu1.4 [13.0 kB]
Get:4 http://us.archive.ubuntu.com/ubuntu focal-updates/main amd64 libnginx-mod-mail amd64 1.18.0-0ubu                                                                                                                                                                                                                       ntu1.4 [42.9 kB]
Get:5 http://us.archive.ubuntu.com/ubuntu focal-updates/main amd64 libnginx-mod-stream amd64 1.18.0-0u                                                                                                                                                                                                                       buntu1.4 [67.4 kB]
Get:6 http://us.archive.ubuntu.com/ubuntu focal-updates/main amd64 nginx-core amd64 1.18.0-0ubuntu1.4                                                                                                                                                                                                                        [425 kB]
Get:7 http://us.archive.ubuntu.com/ubuntu focal-updates/main amd64 nginx all 1.18.0-0ubuntu1.4 [3,620                                                                                                                                                                                                                        B]
Fetched 605 kB in 2s (293 kB/s)
Preconfiguring packages ...
Selecting previously unselected package nginx-common.
(Reading database ... 160070 files and directories currently installed.)
Preparing to unpack .../0-nginx-common_1.18.0-0ubuntu1.4_all.deb ...
Unpacking nginx-common (1.18.0-0ubuntu1.4) ...
Selecting previously unselected package libnginx-mod-http-image-filter.
Preparing to unpack .../1-libnginx-mod-http-image-filter_1.18.0-0ubuntu1.4_amd64.deb ...
Unpacking libnginx-mod-http-image-filter (1.18.0-0ubuntu1.4) ...
Selecting previously unselected package libnginx-mod-http-xslt-filter.
Preparing to unpack .../2-libnginx-mod-http-xslt-filter_1.18.0-0ubuntu1.4_amd64.deb ...
Unpacking libnginx-mod-http-xslt-filter (1.18.0-0ubuntu1.4) ...
Selecting previously unselected package libnginx-mod-mail.
Preparing to unpack .../3-libnginx-mod-mail_1.18.0-0ubuntu1.4_amd64.deb ...
Unpacking libnginx-mod-mail (1.18.0-0ubuntu1.4) ...
Selecting previously unselected package libnginx-mod-stream.
Preparing to unpack .../4-libnginx-mod-stream_1.18.0-0ubuntu1.4_amd64.deb ...
Unpacking libnginx-mod-stream (1.18.0-0ubuntu1.4) ...
Selecting previously unselected package nginx-core.
Preparing to unpack .../5-nginx-core_1.18.0-0ubuntu1.4_amd64.deb ...
Unpacking nginx-core (1.18.0-0ubuntu1.4) ...
Selecting previously unselected package nginx.
Preparing to unpack .../6-nginx_1.18.0-0ubuntu1.4_all.deb ...
Unpacking nginx (1.18.0-0ubuntu1.4) ...
Setting up nginx-common (1.18.0-0ubuntu1.4) ...
Created symlink /etc/systemd/system/multi-user.target.wants/nginx.service → /lib/systemd/system/nginx.                                                                                                                                                                                                                       service.
Setting up libnginx-mod-http-xslt-filter (1.18.0-0ubuntu1.4) ...
Setting up libnginx-mod-mail (1.18.0-0ubuntu1.4) ...
Setting up libnginx-mod-http-image-filter (1.18.0-0ubuntu1.4) ...
Setting up libnginx-mod-stream (1.18.0-0ubuntu1.4) ...
Setting up nginx-core (1.18.0-0ubuntu1.4) ...
Setting up nginx (1.18.0-0ubuntu1.4) ...
Processing triggers for systemd (245.4-4ubuntu3.19) ...
Processing triggers for man-db (2.9.1-1) ...
Processing triggers for ufw (0.36-6ubuntu1) ...
talkit@ubuntu:~$
중간에 Y 한번만 눌러 주시면 됩니다.
 sudo systemctl status nginx
● nginx.service - A high performance web server and a reverse proxy server
     Loaded: loaded (/lib/systemd/system/nginx.service; enabled; vendor preset: enabled)
     Active: active (running) since Sat 2022-12-31 23:56:28 PST; 51s ago
       Docs: man:nginx(8)
   Main PID: 2701 (nginx)
      Tasks: 17 (limit: 19071)
     Memory: 13.8M
     CGroup: /system.slice/nginx.service
             ├─2701 nginx: master process /usr/sbin/nginx -g daemon on; master_process on;
             ├─2702 nginx: worker process
             ├─2703 nginx: worker process
             ├─2704 nginx: worker process
             ├─2705 nginx: worker process
             ├─2706 nginx: worker process
             ├─2707 nginx: worker process
             ├─2708 nginx: worker process
             ├─2709 nginx: worker process
             ├─2710 nginx: worker process
             ├─2711 nginx: worker process
             ├─2712 nginx: worker process
             ├─2713 nginx: worker process
             ├─2714 nginx: worker process
             ├─2715 nginx: worker process
             ├─2716 nginx: worker process
             └─2717 nginx: worker process

Dec 31 23:56:28 ubuntu systemd[1]: Starting A high performance web server and a reverse proxy server...
Dec 31 23:56:28 ubuntu systemd[1]: Started A high performance web server and a reverse proxy server.
리눅스 서비스를 확인하면 이미 nginx가 활성화 되어 있는 상태 입니다. ^^
방화벽 설정 - 생략
방화벽 관련 설정도 있지만 방화벽 설정은 안해서 ^^
웹서버에 브라우져로 접속해 보기
웹서버가 켜져 있는걸 확인 했으니까 브라우져로 접속을 해보겠습니다.
Welcome to nginx!
If you see this page, the nginx web server is successfully installed and working. Further configuration is required.

For online documentation and support please refer to nginx.org.
Commercial support is available at nginx.com.

Thank you for using nginx.