그런데 무료로 한게 아니고 대부분 돈을 내고 인증서를 샀습니다. 그리고 1년에 한번 갱신하는 형태로 진행을 했습니다.
그런데, Let's Encrypt는 무료이고 3개월에 한번씩 갱신을 해줘야 합니다.
Crontab의 사용법
오늘은 간단한 사용법을 알려 드리고, Crontab 만으로 다른 글을 하나 더 적도록 하겠습니다.
crontab에 스케쥴을 등록해보자.
sudo crontab -e
음 위 명령어를 입력 합니다.
 sudo crontab -e
[sudo] password for talkit:
no crontab for root - using an empty one

Select an editor.  To change later, run 'select-editor'.
  1. /bin/nano        <---- easiest
  2. /usr/bin/vim.tiny
  3. /bin/ed

Choose 1-3 [1]:
crontab 을 처음 수행하면 무슨 편집기로 편집 할꺼냐고 묻습니다.
저희는 vi를 쓸줄 안다고 생각하고 ^^
2번을 선택 합니다. ^^
# Edit this file to introduce tasks to be run by cron.
#
# Each task to run has to be defined through a single line
# indicating with different fields when the task will be run
# and what command to run for the task
#
# To define the time you can provide concrete values for
# minute (m), hour (h), day of month (dom), month (mon),
# and day of week (dow) or use '*' in these fields (for 'any').
#
# Notice that tasks will be started based on the cron's system
# daemon's notion of time and timezones.
#
# Output of the crontab jobs (including errors) is sent through
# email to the user the crontab file belongs to (unless redirected).
#
# For example, you can run a backup of all your user accounts
# at 5 a.m every week with:
# 0 5 * * 1 tar -zcf /var/backups/home.tgz /home/
#
# For more information see the manual pages of crontab(5) and cron(8)
#
# m h  dom mon dow   command
~
~
~
~
위와 같이 나올껍니다.
vi는 계속 알려 드려야 하는데 일단
:$를 입력하시고 엔터 치십시오
그러면 맨 마지막줄로 갈껍니다.
그리고 o 키를 누르신 다음
0 5 * * * /usr/bin/certbot renew --quiet
요렇게 해주면 인증서 만료일이 30일이내면 자동으로 매일 새벽 5시에 인증서를 갱신합니다. 자동 갱신 후에는 다시 30일이 남아야 갱신을 하겠죠 ^^
그런데, 여기서 힌트를 하나 얻어야 합니다.
저 같은경우는 늘 컴퓨터를 켜두는 편이긴 한데 켜두질 않는 경우는 수동으로 하면 되겠지요 ^^
 sudo certbot --nginx -d example.com -d www.example.com
Saving debug log to /var/log/letsencrypt/letsencrypt.log
Plugins selected: Authenticator nginx, Installer nginx
Enter email address (used for urgent renewal and security notices) (Enter 'c' to
cancel):

- - - - - - - - - - - - - - - - - - - - - - - - - - - - - - - - - - - - - - - -
Please read the Terms of Service at
https://letsencrypt.org/documents/LE-SA-v1.3-September-21-2022.pdf. You must
agree in order to register with the ACME server at
https://acme-v02.api.letsencrypt.org/directory
- - - - - - - - - - - - - - - - - - - - - - - - - - - - - - - - - - - - - - - -
(A)gree/(C)ancel: A

- - - - - - - - - - - - - - - - - - - - - - - - - - - - - - - - - - - - - - - -
Would you be willing to share your email address with the Electronic Frontier
Foundation, a founding partner of the Let's Encrypt project and the non-profit
organization that develops Certbot? We'd like to send you email about our work
encrypting the web, EFF news, campaigns, and ways to support digital freedom.
- - - - - - - - - - - - - - - - - - - - - - - - - - - - - - - - - - - - - - - -
(Y)es/(N)o: Y
Obtaining a new certificate
Performing the following challenges:
http-01 challenge for example.com
Waiting for verification...
Challenge failed for domain example.com
http-01 challenge for example.com
Cleaning up challenges
Some challenges have failed.

IMPORTANT NOTES:
 - The following errors were reported by the server:

   Domain: example.com
   Type:   connection
   Detail: 공인아이피: Fetching
   http://example.com/.well-known/acme-challenge/f8kAgZFm0jvoMhu3mbtN5F7IS7B7xcXupFP1XN7C-NU:
   Timeout during connect (likely firewall problem)

   To fix these errors, please make sure that your domain name was
   entered correctly and the DNS A/AAAA record(s) for that domain
   contain(s) the right IP address. Additionally, please check that
   your computer has a publicly routable IP address and that no
   firewalls are preventing the server from communicating with the
   client. If you're using the webroot plugin, you should also verify
   that you are serving files from the webroot path you provided.
 - Your account credentials have been saved in your Certbot
   configuration directory at /etc/letsencrypt. You should make a
   secure backup of this folder now. This configuration directory will
   also contain certificates and private keys obtained by Certbot so
   making regular backups of this folder is ideal.
저는 집에 있는 컴픀터에 SSL인증 중이라서 ^^ 오류가 나네요 T.T 제가 보안 때문에 몇가지 검사를 위해서 서버에 접속을 했는데 접속이 안된답니다. ^^
그래서 저는 IP타임 공유기의 설정을 변경해서 다시 아래 명령어를 수행 했습니다.
 sudo systemctl restart nginx
talkit@ubuntu:~$ sudo certbot --nginx -d example.com
Saving debug log to /var/log/letsencrypt/letsencrypt.log
Plugins selected: Authenticator nginx, Installer nginx
Obtaining a new certificate
Performing the following challenges:
http-01 challenge for example.com
Waiting for verification...
Cleaning up challenges
Deploying Certificate to VirtualHost /etc/nginx/sites-enabled/example.com

Please choose whether or not to redirect HTTP traffic to HTTPS, removing HTTP access.
- - - - - - - - - - - - - - - - - - - - - - - - - - - - - - - - - - - - - - - -
1: No redirect - Make no further changes to the webserver configuration.
2: Redirect - Make all requests redirect to secure HTTPS access. Choose this for
new sites, or if you're confident your site works on HTTPS. You can undo this
change by editing your web server's configuration.
- - - - - - - - - - - - - - - - - - - - - - - - - - - - - - - - - - - - - - - -
Select the appropriate number [1-2] then [enter] (press 'c' to cancel): 2
Redirecting all traffic on port 80 to ssl in /etc/nginx/sites-enabled/example.com

- - - - - - - - - - - - - - - - - - - - - - - - - - - - - - - - - - - - - - - -
Congratulations! You have successfully enabled https://example.com

You should test your configuration at:
https://www.ssllabs.com/ssltest/analyze.html?d=example.com
- - - - - - - - - - - - - - - - - - - - - - - - - - - - - - - - - - - - - - - -

IMPORTANT NOTES:
 - Congratulations! Your certificate and chain have been saved at:
   /etc/letsencrypt/live/example.com/fullchain.pem
   Your key file has been saved at:
   /etc/letsencrypt/live/example.com/privkey.pem
   Your cert will expire on 2023-04-01. To obtain a new or tweaked
   version of this certificate in the future, simply run certbot again
   with the "certonly" option. To non-interactively renew *all* of
   your certificates, run "certbot renew"
 - If you like Certbot, please consider supporting our work by:

   Donating to ISRG / Let's Encrypt:   https://letsencrypt.org/donate
   Donating to EFF:                    https://eff.org/donate-le
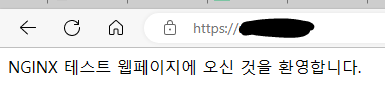
위와 같이 성공 했습니다.
오 ^^
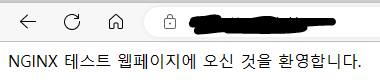
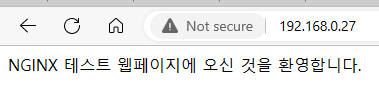
오 저 앞에 Not secure가 없어졌습니다. ^^
이번 글은 여기까지 하고, 다음글에서는 Let's Encrypt의 갱신 자동화에 대해서 글을 또하나 적어보고, 또한 도메인 구매와 도메인 설정(DNS)에 관해서 알아보겠습니다.