반응형

안녕하세요 가야태자 @talkit 입니다. 

오늘은 카프카라는 프로그램을 설치 해보겠습니다. 

카프카에 대한 설명은 조금 안바빠지면 달고, 까먹지 않도록 카프카를 설치 하는 과정을 글에 담을 예정입니다. 

그래도 간단하게 카프카를 이야기 하면,

소스와 타겟을 연계해주는 프로그램 또는 링크드인에서 개발한 Message Queue 정도로 생각 됩니다. 

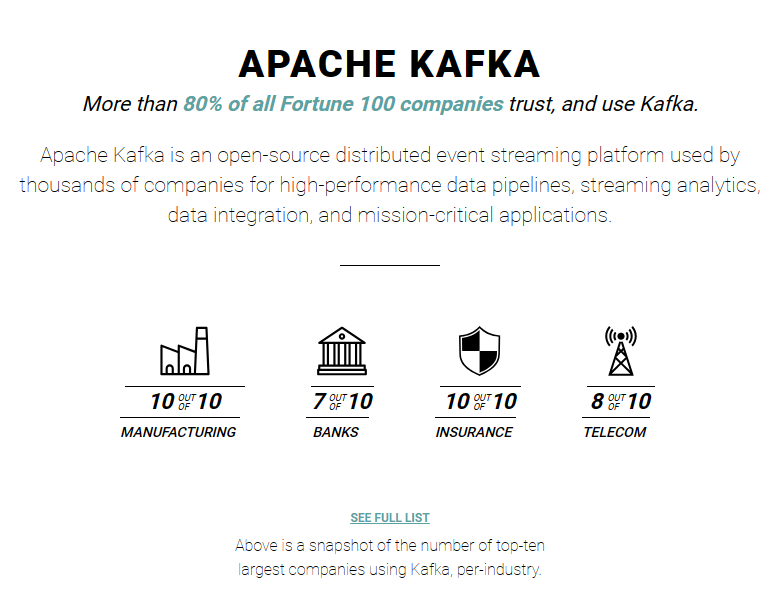
Apache Kafka 카프카는 아파치의 메인 프로젝트 중에 하나 입니다. Linkedin에서 개발 후에 아파치 재단에 기부 했습니다. 

그럼 본격적으로 설치를 시작 해보겠습니다. 

Java가 리눅스에 설치 되어 있다고 생각하고 설치를 시작 하겠습니다.


https://kafka.apache.org/quickstart


Apache Kafka

Apache Kafka: A Distributed Streaming Platform.

kafka.apache.org

저는 우선 저문서를 보고 따라해 보겠습니다. 

그런데 약간 변경 해야할 부분이 있어서 변경 하면서 진행 하겠습니다. 

카프카를 다운로드 해야 하는데 저기서는 최신 버전을 다운로드 하고 있습니다. 

제가 다운로드 해야할 버젼은 2.13-3.40 이라서 위에서 현재 링크 걸려 있는 링크를 변경 해야 합니다. 

https://kafka.apache.org/downloads


Apache Kafka

Apache Kafka: A Distributed Streaming Platform.

kafka.apache.org

위 페이지로 이동 합니다. 

Scala의 버전이 뭔지는 모르겠지만, 설치 해야 할 버전이 2.13 즉 앞에 것이고 뒤에 것이 실질적으로 카프가 버전 입니다. 

3.4.0

Kafka 3.4.0 includes a significant number of new features and fixes. For more information, please read our blog post and the detailed Release Notes.

위 부분에 있는 두번째 파일을 다운로드 합니다. 

cd /opt
mkidr kafka
cd kafka
wget https://archive.apache.org/dist/kafka/3.4.0/kafka_2.13-3.4.0.tgz

저는 /opt 폴더에 요즘은 설치를 하고 있스니다. 예전에는 /usr/local 에 설치를 많이 했었습니다. 

다운로드 끝났으면 다운로드 받은 파일을 압축을 해제 합니다. 

tar xzvfp kafka_2.13-3.4.0.tgz

압축이 잘 해제 되었으면

해당 폴더로 이동 합니다. 

cd kafka_2.13-3.4.0
 # Start Zookeeper
 bin/zookeeper-server-start.sh config/zookeeper.properties

주키퍼를 우선 실행 합니다. 

실행 방법은 위에서 두번째 줄을 복사 붙여 넣기 하시면 됩니다. ^^

위아 같이 실행 하시면 실행은 됩니다만, 해당 창을 계속 띄워 두고 있어야 합니다. 

우선은 띄우두고 ^^

카프카를 실행 해보겠습니다. 

새로운 콘솔창을 하나 더 여십시오 Putty로 한번더 연결 하셔도 됩니다. 

cd /opt/kafka/kafka_2.13-3.4.0

# Start Kafka
bin/kafka-server-start.sh config/server.properties

요렇게 하시면 잘 실행이 될 것입니다. 

단, 디렉토리는 직접 설치한 디렉토리로 이동 하셔야 합니다. 

창을 하나 띄워서 간단하게 실제로 카프카에 토픽을 하나 만들어 보겠습니다. 

그리고, 오늘 글은 마치도록 하겠습니다. 

cd /opt/kafka/kafka_2.13-3.4.0
# Create topic
bin/kafka-topics.sh --create --topic quickstart-events --bootstrap-server localhost:9092

위와 같이 토픽을 만드실 수 있습니다. 

이번에도 Putty를 그대로 두시고 새 Putty를 여서서 접속 하신 다음에 위 명령어를 입력해 주셔야 합니다. 

저는 순서대로 실행 했더니 ^^

Created topic quickstart-events.

위와 같은 결과가 나왔습니다.

이왕 토픽을 만들었으니, 토픽 리스트도 한번 보겠습니다. 

# Show topic information
bin/kafka-topics.sh --describe --topic quickstart-events --bootstrap-server localhost:9092

위 명령어를 입력 했더니 아래와 같이 잘 실행 되었습니다. 

Topic: quickstart-events        TopicId: N8Ymu4GGTNiCgSp63YK_cw PartitionCount: 1       ReplicationFactor: 1    Configs:
        Topic: quickstart-events        Partition: 0    Leader: 0       Replicas: 0     Isr: 0

앗 위에서 설명 드린다고 한 것을 하나 못한게 있어서 

이어서 작성 하겠습니다. 

우선, 여러분들이 띄워 둔 zookeeper, kafka 실행 창을  콘트롤(Ctrl) + C 키를 눌러서 중단 하십시오.

systemctl형식으로 만들어도 좋습니다. 

하지만, 이번에는 그냥 백그라운로드로 실행하는 방법을 알려 드리겠습니다. 

 cd /opt/kafka/kafka_2.13-3.4.0
 # Start Zookeeper
nohup bin/zookeeper-server-start.sh config/zookeeper.properties &
 
 # Start Kafka
nohup bin/kafka-server-start.sh config/server.properties &

위와 같이 실행 하시면 됩니다. 

아까는 중단 할 때 콘트롤(Ctrl) C를 이용해서 했는데 백그라운드로 떠있는 아이들은 어떻게 죽이나요?

종료 하는 방법은 켜실때와 반대로 카프카 먼저 죽이고,

주키퍼를 죽이는 것이 좋습니다. 

cd /opt/kafka/kafka_2.13-3.4.0
#Stop kafka
bin/kafka-server-stop.sh

#Stop zookeeper
bin/zookeeper-server-stop.sh

위 명령어를 수행 해서 죽일 수 있습니다. 

[2]+  Exit 143                nohup bin/kafka-server-start.sh config/server.properties
[1]+  Exit 143                nohup bin/zookeeper-server-start.sh config/zookeeper.properties

백그라운드로 실행 되었던 2가지 명령어가 종료 된 것을 볼 수 있습니다. 

감사합니다. 


반응형
반응형

안녕하세요. 가야태자 @talkit 입니다.

궁극적으로 하려고 하는 것은 Mattermost라는 Slack 대체 프로그램에 TLS 기반의 SSL을 도입하게 하는 것입니다.

그전에 NGINX를 잘 몰라서 설치해보고, SSL을 어떻게 구성하는지를 좀 알아보고 다시 Mattermost를 손을 대야 할 것 같습니다.

웹서버는?

웹서버는 간단하게 정의하자면 웹을 서비스하는 서버 입니다. 저희가 http 또는 https로 시작하는 주소를 입력하면 브라우져에서 여러 화면들을 확인하게 되는데, 그 주소에 웹서버가 있기 때문입니다.

그런데, 저는 Apache Web Server 주로 사용하는 사람입니다. 하지만, 그렇다고, 블로그에 아파치를 설치하는 방법을 적은 적이 없네요 ^^ 앞으로는 적도록 하겠습니다.

https://httpd.apache.org/

아파치 웹서버는 위 URL에서 정보를 확인하고 다운로드 할 수 있습니다.

물론 Ubuntu에서 기본 패키지로 제공하기 때문에 금방 설치할 수 있습니다.

이번에 적으려고 하는 NGINX도 웹서버의 일종입니다. Apache 보다는 좀 더 뒤에 나온 제품이어서 좀 더 신선한 기능들을 제공하긴 하지만, 서로 경쟁 관계여서 요즘은 NGINX가 좀 더 점유율을 가져가고 있다고 알고 있습니다. ^^ 서로를 보고 보완을 하고 있는 것으로 알고 있습니다.

W3Techs - extensive and reliable web technology surveys 출처 : https://w3techs.com/

위에서 보시다 싶이 NGIX가 1.1% 정도 우위를 점유하고 있습니다.

NGINX의 공식 웹사이트는 https://nginx.org/en/ 에서 확인할 수 있습니다.

우리는 우분투 리눅스에 오늘 NGINX를 설치할 것입니다. ^^

우분투 리눅스 설치.

리눅스/Linux VMWARE에 우분투/Ubuntu 20.04 설치하기/Install https://talkit.tistory.com/677

리눅스/Linux VMWARE에 우분투/Ubuntu 18.04 설치하기/Install https://talkit.tistory.com/637

위두 글을 이용해서 VMWARE에 리눅스를 설치 하십시오.

Putty 로 리눅스에 접속하기

[무료소프트웨어] 무료 보안쉘 클라이언트 PuTTY 최신 버전 다운로드 및 설치하기. How to Install the latest version PuTTY that is free Secure Shell Client. https://talkit.tistory.com/674

리눅스/Linux 오라클 VPS에 접속해보자. How to connect to free VPS on Oracle Cloud. https://talkit.tistory.com/673

리눅스/Linux SSH를 통해서 VMWARE Linux에 접속해보자. How to connect to Linux on VMWARE via SSH https://talkit.tistory.com/688

리눅스에 접속하시는 방법은 위 글들에서 설명해 두었습니다. 참고해서 접속하시면 될 것 같습니다.

리눅스에 NGINX 설치

저는 계속 Putty러 접속을 합니다.

여러분들이 VMWARE에 우분투를 설치하셨거나, 우분투 리눅스 VPS를 하나 가지고 계시거나 하다는 전제 하에서 이 글은 시작 하고 있습니다.

리눅스에 접속하기

서버에 우선 접속하십시오.

Putty를 여시고 저기 주소에 입력하시거나 아래에 있는 저장된 세션에서 선택해서 접속 하시면 됩니다.

login as: talkit
talkit@192.168.0.27's password:
Welcome to Ubuntu 20.04.5 LTS (GNU/Linux 5.15.0-56-generic x86_64)

 * Documentation:  https://help.ubuntu.com
 * Management:     https://landscape.canonical.com
 * Support:        https://ubuntu.com/advantage

0 updates can be applied immediately.

Your Hardware Enablement Stack (HWE) is supported until April 2025.
Last login: Thu Dec 29 23:51:08 2022 from 192.168.0.3
talkit@ubuntu:~$ ps -ef | grep nginx
talkit      2021    2007  0 23:50 pts/0    00:00:00 grep --color=auto nginx
talkit@ubuntu:~$

저는 잘 접속이 되었구요.

접속해서 ps로 nginx가 없는 것 까지 확인 했습니다. 제가 Mattermost를 설치하면서 nginx도 설치 했거든요 ^^

nginx 설치 이전으로 VMWARE파일을 돌려 놨습니다.

NGINX 설치하기

그 다음 과정을 계속 진행 하겠습니다.

sudo apt update

위 명령어는 옵셔널 이긴 하지만 한번씩 해주는 것이 좋습니다.

sudo apt install nginx

NGINX 설치는 정말 간단합니다. ^^

 sudo apt install nginx
Reading package lists... Done
Building dependency tree
Reading state information... Done
The following additional packages will be installed:
  libnginx-mod-http-image-filter libnginx-mod-http-xslt-filter libnginx-mod-mail libnginx-mod-stream
  nginx-common nginx-core
Suggested packages:
  fcgiwrap nginx-doc
The following NEW packages will be installed:
  libnginx-mod-http-image-filter libnginx-mod-http-xslt-filter libnginx-mod-mail libnginx-mod-stream
  nginx nginx-common nginx-core
0 upgraded, 7 newly installed, 0 to remove and 0 not upgraded.
Need to get 605 kB of archives.
After this operation, 2,141 kB of additional disk space will be used.
Do you want to continue? [Y/n] y
Get:1 http://us.archive.ubuntu.com/ubuntu focal-updates/main amd64 nginx-common all 1.18.0-0ubuntu1.4                                                                                                                                                                                                                        [37.7 kB]
Get:2 http://us.archive.ubuntu.com/ubuntu focal-updates/main amd64 libnginx-mod-http-image-filter amd6                                                                                                                                                                                                                       4 1.18.0-0ubuntu1.4 [14.8 kB]
Get:3 http://us.archive.ubuntu.com/ubuntu focal-updates/main amd64 libnginx-mod-http-xslt-filter amd64                                                                                                                                                                                                                        1.18.0-0ubuntu1.4 [13.0 kB]
Get:4 http://us.archive.ubuntu.com/ubuntu focal-updates/main amd64 libnginx-mod-mail amd64 1.18.0-0ubu                                                                                                                                                                                                                       ntu1.4 [42.9 kB]
Get:5 http://us.archive.ubuntu.com/ubuntu focal-updates/main amd64 libnginx-mod-stream amd64 1.18.0-0u                                                                                                                                                                                                                       buntu1.4 [67.4 kB]
Get:6 http://us.archive.ubuntu.com/ubuntu focal-updates/main amd64 nginx-core amd64 1.18.0-0ubuntu1.4                                                                                                                                                                                                                        [425 kB]
Get:7 http://us.archive.ubuntu.com/ubuntu focal-updates/main amd64 nginx all 1.18.0-0ubuntu1.4 [3,620                                                                                                                                                                                                                        B]
Fetched 605 kB in 2s (293 kB/s)
Preconfiguring packages ...
Selecting previously unselected package nginx-common.
(Reading database ... 160070 files and directories currently installed.)
Preparing to unpack .../0-nginx-common_1.18.0-0ubuntu1.4_all.deb ...
Unpacking nginx-common (1.18.0-0ubuntu1.4) ...
Selecting previously unselected package libnginx-mod-http-image-filter.
Preparing to unpack .../1-libnginx-mod-http-image-filter_1.18.0-0ubuntu1.4_amd64.deb ...
Unpacking libnginx-mod-http-image-filter (1.18.0-0ubuntu1.4) ...
Selecting previously unselected package libnginx-mod-http-xslt-filter.
Preparing to unpack .../2-libnginx-mod-http-xslt-filter_1.18.0-0ubuntu1.4_amd64.deb ...
Unpacking libnginx-mod-http-xslt-filter (1.18.0-0ubuntu1.4) ...
Selecting previously unselected package libnginx-mod-mail.
Preparing to unpack .../3-libnginx-mod-mail_1.18.0-0ubuntu1.4_amd64.deb ...
Unpacking libnginx-mod-mail (1.18.0-0ubuntu1.4) ...
Selecting previously unselected package libnginx-mod-stream.
Preparing to unpack .../4-libnginx-mod-stream_1.18.0-0ubuntu1.4_amd64.deb ...
Unpacking libnginx-mod-stream (1.18.0-0ubuntu1.4) ...
Selecting previously unselected package nginx-core.
Preparing to unpack .../5-nginx-core_1.18.0-0ubuntu1.4_amd64.deb ...
Unpacking nginx-core (1.18.0-0ubuntu1.4) ...
Selecting previously unselected package nginx.
Preparing to unpack .../6-nginx_1.18.0-0ubuntu1.4_all.deb ...
Unpacking nginx (1.18.0-0ubuntu1.4) ...
Setting up nginx-common (1.18.0-0ubuntu1.4) ...
Created symlink /etc/systemd/system/multi-user.target.wants/nginx.service → /lib/systemd/system/nginx.                                                                                                                                                                                                                       service.
Setting up libnginx-mod-http-xslt-filter (1.18.0-0ubuntu1.4) ...
Setting up libnginx-mod-mail (1.18.0-0ubuntu1.4) ...
Setting up libnginx-mod-http-image-filter (1.18.0-0ubuntu1.4) ...
Setting up libnginx-mod-stream (1.18.0-0ubuntu1.4) ...
Setting up nginx-core (1.18.0-0ubuntu1.4) ...
Setting up nginx (1.18.0-0ubuntu1.4) ...
Processing triggers for systemd (245.4-4ubuntu3.19) ...
Processing triggers for man-db (2.9.1-1) ...
Processing triggers for ufw (0.36-6ubuntu1) ...
talkit@ubuntu:~$

중간에 Y 한번만 눌러 주시면 됩니다.

 sudo systemctl status nginx
● nginx.service - A high performance web server and a reverse proxy server
     Loaded: loaded (/lib/systemd/system/nginx.service; enabled; vendor preset: enabled)
     Active: active (running) since Sat 2022-12-31 23:56:28 PST; 51s ago
       Docs: man:nginx(8)
   Main PID: 2701 (nginx)
      Tasks: 17 (limit: 19071)
     Memory: 13.8M
     CGroup: /system.slice/nginx.service
             ├─2701 nginx: master process /usr/sbin/nginx -g daemon on; master_process on;
             ├─2702 nginx: worker process
             ├─2703 nginx: worker process
             ├─2704 nginx: worker process
             ├─2705 nginx: worker process
             ├─2706 nginx: worker process
             ├─2707 nginx: worker process
             ├─2708 nginx: worker process
             ├─2709 nginx: worker process
             ├─2710 nginx: worker process
             ├─2711 nginx: worker process
             ├─2712 nginx: worker process
             ├─2713 nginx: worker process
             ├─2714 nginx: worker process
             ├─2715 nginx: worker process
             ├─2716 nginx: worker process
             └─2717 nginx: worker process

Dec 31 23:56:28 ubuntu systemd[1]: Starting A high performance web server and a reverse proxy server...
Dec 31 23:56:28 ubuntu systemd[1]: Started A high performance web server and a reverse proxy server.

리눅스 서비스를 확인하면 이미 nginx가 활성화 되어 있는 상태 입니다. ^^

방화벽 설정 - 생략

방화벽 관련 설정도 있지만 방화벽 설정은 안해서 ^^

웹서버에 브라우져로 접속해 보기

웹서버가 켜져 있는걸 확인 했으니까 브라우져로 접속을 해보겠습니다.

Welcome to nginx!
If you see this page, the nginx web server is successfully installed and working. Further configuration is required.

For online documentation and support please refer to nginx.org.
Commercial support is available at nginx.com.

Thank you for using nginx.

잘 설치 되었다고 뜨네요 ^^

기본적으로 여기까지하면 웹서버가 설치 되었습니다. 

다음에는 웹서버의 웹 문서들을 어디에 놓을 건지에 대해서 말씀 드리겠습니다. 

감사합니다. 


반응형
반응형

T.T

어제 삽질을 어찌나 했던지

앞으로는 register_globals 옵션을 Off로 두고 개발을 해야겠습니다. ^^;;

최신 버전으로 회사 서버를 갈아 엎으려고

삽질 중이었는데

현재 최신 버젼인 5.3.17을 설치 했더니

php.ini를 넣고 나서 오류가 계속 발생하는 겁니다. T.T

그래서 봤더니

5.3.0 부터 register_globals라는 옵션을 지원하지 않는다네요 T.T

다른 분들두 조심하시고요

그래서 전 서버에 5.2.17 버젼을 설치 했습니다.

그라고 모든 것을 해결 ^^;;

반응형
반응형


이번에 참여해서 진행하고 있는 프로젝트 요구사항 중에 하나가


보안서버를 적용 하는 것이었습니다.


그런데,


몇가지 이슈 때문에 전체에 SSL을 적용하는 것으로 했습니다.


몇가지 우여 곡절 끝에


Application이 있는 서버와 이미지 서버를 분리 하기로 했습니다.


그런데 이미지서버가 주기적으로 매우 느려 지는 현상을 발견 했습니다.


그래서 아파치 설정을 변경 하던 중에


#SSLSessionCache        none
#SSLSessionCache        shmht:/usr/********/apache2/logs/ssl_scache(512000)
#SSLSessionCache        shmcb:/usr/********/apache2/logs/ssl_scache(512000)
SSLSessionCache         dbm:/usr/********/apache2/logs/ssl_scache
SSLSessionCacheTimeout  300


이렇게 설정 되어 있는 것을 발견 했습니다.


Timeout도 바꿔 보고


KeepAliveTime 등도 바꿔 봤지만


소용이 없었는뎅


위의 것을 발견 하고는


그 주기가 5분이라는 것을 알았습니다. ^^;;


SSL 세션 캐쉬를 남기는 시간 5분마다 느려졌던거죠 T.T


그래서


젤위에 있는 none를 주석을 풀고


밑에 있는 두줄


시간 설정과 캐쉬 파일 설정을


주석 처리 했습니다.


그리고 아파치를 다시 켜서


스트레스 테스트를 진행 했는데


끄떡 없는 것을 발견했습니다.


저거 발견하기 전에 삽질한걸 생각하면 T.T


다른 분들은 이런 삽질을 좀 안했으면 해서 적어 봅니다.


좋은 하루 되십시오.


이 글은 스프링노트에서 작성되었습니다.

반응형
반응형

일반적으로 ab https://yourdomain.com


이렇게 하면 


 SSL not compiled in; no https support


메시지를 만나게 됩니다.


그래서 열심히 뒤졌습니다. ^^;;


기본적으로 컴파일 된 ab는 SSL을 지원하지 못한다고 되어있더라구용


그럼 어떻게 컴파일 해야 되는지를 조사하게 되었습니다.


SSL을 컴파일 할때 기본적으로


./configure --with-ssl --with-mpm=prefork --prefix=/home/ase/non/install --with-mods-shared=most ./configure --with-ssl --with-mpm=prefork --prefix=/home/ase/non/install --with-mods-shared=most


위와 비슷한 컴파일 옵션을 줄겁니다.


이렇게 하면 아파치로  SSL 서비스를 할 수 있지만


ab로 ssl 테스트는 진행 할 수 없습니다.


./configure --with-ssl --enable-ssl --with-mpm=prefork --prefix=/home/ase/non/install --with-mods-shared=most


컴파일 하실때 옵션을 위와 같이 주시면


ssl이 테스트 가능한 ab가 컴파일 이 됩니다.


여기서 중요한 것은


--enable-ssl 을 추가 해주는 것입니다.


아파치 configure의 도움말을 보면


--enable-ssl            SSL/TLS support (mod_ssl)


요렇게 되어 있답니다.


이제 다시


./ab  https://yourdomain.com


해보니깐


일반적으로 http에서 내보내는 메시지와 동일한 값을 보여 주네용 ^^;;


모두들 좋은 하루 되십시오..


 참고로 제가 테스트 해본 아파치 소스는 apache 2.1.13


입니다.


그리고


잘 아시겠지만 혹시나 해서용


yourdomain.com 은 그냥 제가 문서적을때 적는겁니다.


자기자신의 도메인이나 테스트하려고 하는 적당한 도메인으로 변경 하십시오 ^^;;


 앗 출처...


제가 참조한 곳은 


아래 주소 입니다.


http://www.linuxquestions.org/blog/zhjim-147126/2009/8/24/apache2.2-ab-with-ssl-2204/


이 글은 스프링노트에서 작성되었습니다.

반응형

+ Recent posts